Has your dog been getting into things he’s not supposed to? Or maybe you just need a place to keep him contained when you’re not home.
Either way, a DIY dog gate is a perfect solution!
This easy project can be completed in just a few hours, and it’s a lot cheaper than buying one from the store. Plus, you can customize it to fit your specific needs.
So gather your supplies and get started!
DIY Modern Dog Gate
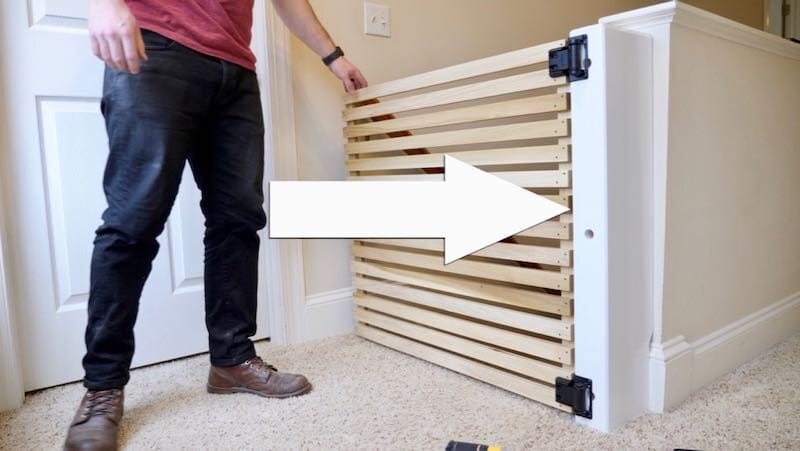
This sleek and modern dog gate is perfect for those who want something that looks good and works well. It’s made out of wood, so it’s sturdy and will last for years. And the best part is, it’s very easy to build!
You will need
- 1×2 lumber (length will depend on the size of your opening)
- Drill
- Circular saw
- Paint or stain (optional)
- Screws
- Latch (optional)
Instructions
1. Cut the 1×2 lumber to the desired length. If you’re not sure how long to make it, err on the side of making it too long. You can always trim it down later if needed.
2. Drill holes for the screws. You’ll want to drill two holes at each end of the board, spaced about 6 inches apart.
3. Cut the board to size. If you’re using a circular saw, be sure to make your cut on the outside of the drilled holes. This will prevent the saw blade from hitting the screws.
4. Paint or stain the board, if desired. This step is entirely optional, but it can help the gate blend in with your décor.
5. Attach the screws. Be sure to use screws that are long enough to go through the thickness of the board and into the door frame.
6. Add a latch, if desired. This step is also optional, but it can help keep the gate closed when you need it to be.
DIY PVC Dog Gate

If you’re looking for a sturdier option, this PVC dog gate is the way to go. It’s also very easy to make, and it can be completed in just a few hours.
You will need
- 1 inch PVC pipe
- PVC connectors
- PVC cutter
- Drill
- Paint or wrap (optional)
Instructions
1. Cut the PVC pipe to the desired length. You’ll want to make sure that the gate is tall enough to keep your dog contained, but not so tall that he can jump over it.
2. Attach the PVC connectors. You’ll need two connectors for each end of the pipe.
3. Drill holes for the screws. You’ll want to drill two holes at each connector, spaced about 6 inches apart.
4. Paint or wrap the PVC pipe, if desired. This step is entirely optional, but it can help the gate blend in with your décor.
5. Attach the screws. Be sure to use screws that are long enough to go through the thickness of the PVC pipe and into the door frame.
6. Add a latch, if desired. This step is also optional, but it can help keep the gate closed when you need it to be.
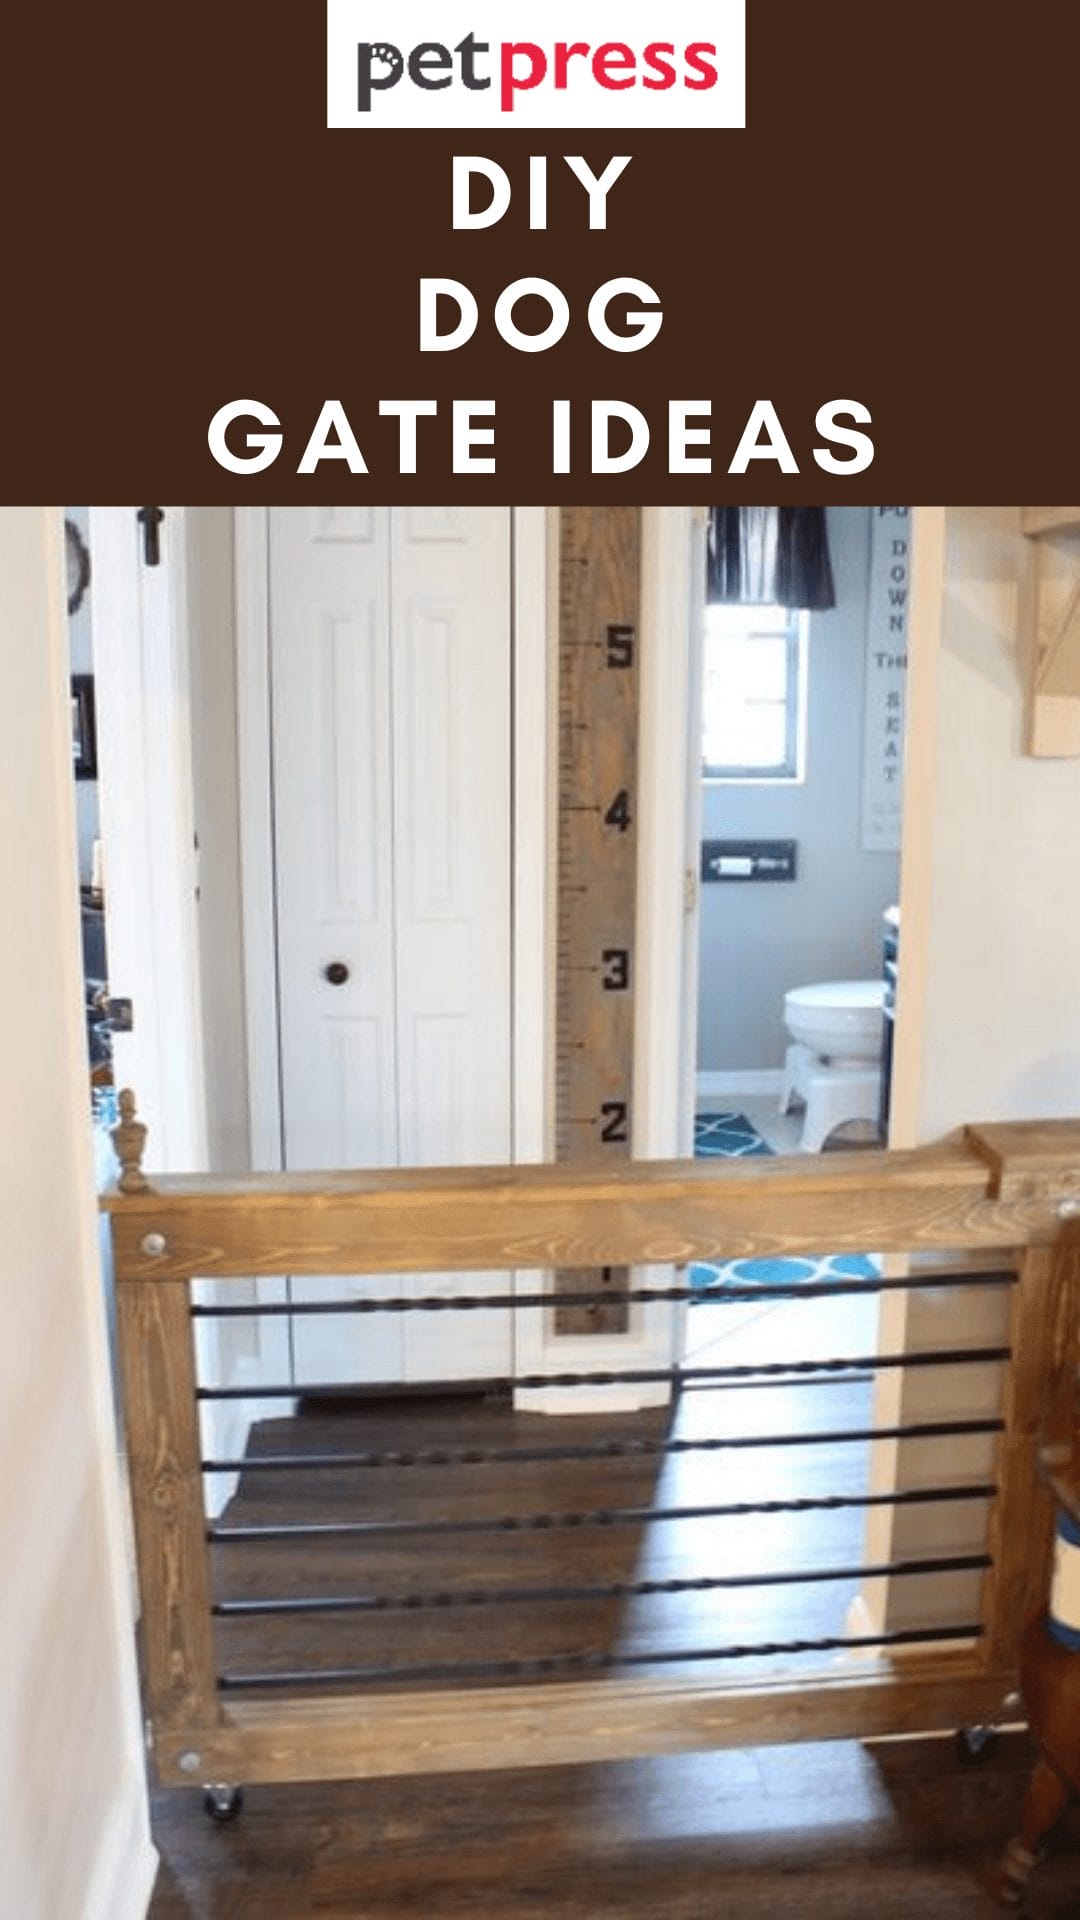
DIY Sliding Dog Gate
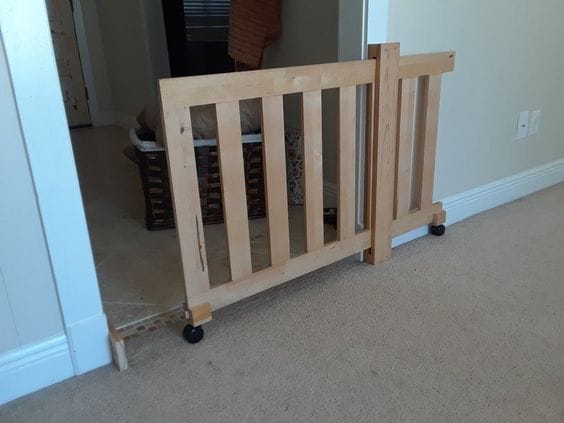
This sliding dog gate is a great option if you need to block off a wide opening. It’s also very easy to make, and it can be completed in just a few hours.
You will need
- 1×2 lumber (length will depend on the size of your opening)
- Drill
- Circular saw
- Paint or stain (optional)
- Screws
- Latch (optional)
- Wheels (4)
Instructions
1. Cut the 1×2 lumber to the desired length. If you’re not sure how long to make it, err on the side of making it too long. You can always trim it down later if needed.
2. Drill holes for the screws. You’ll want to drill two holes at each end of the board, spaced about 6 inches apart.
3. Cut the board to size. If you’re using a circular saw, be sure to make your cut on the outside of the drilled holes. This will prevent the saw blade from hitting the screws.
4. Paint or stain the board, if desired. This step is entirely optional, but it can help the gate blend in with your décor.
5. Attach the screws. Be sure to use screws that are long enough to go through the thickness of the board and into the door frame.
6. Add a latch, if desired. This step is also optional, but it can help keep the gate closed when you need it to be.
7. Attach the wheels. You’ll want to attach two wheels to each end of the board, spaced about 6 inches apart. Be sure to use screws that are long enough to go through the thickness of the board and into the wheels.
8. Test the gate to make sure it slides smoothly. If it doesn’t, try adjusting the placement of the wheels.
And that’s it! Your DIY dog gate is now complete.
Customize it to your needs and enjoy peace of mind knowing that your furry friend is safe and sound.
Place it in the desired location and let your pup enjoy his newfound freedom!
With just a few materials and some basic DIY skills, you can make your own dog gate in no time.
And if you want to take things one step further, why not try making your own DIY dog collars? We’ve got a tutorial for that too.
So what are you waiting for? Get started on keeping your pet safe and stylish today!
- Can Cats Eat Broccoli? Is It Safe or Should You Avoid It? - July 9, 2026
- Can Cats Eat Mango? Vet-Reviewed, Risks & Safe Feeding Guide - July 8, 2026
- Can Cats Eat Popcorn? What Every Cat Owner Needs to Know - July 3, 2026
GIPHY App Key not set. Please check settings