Welcome to the world of DIY hamster playgrounds, where creativity meets comfort for your furry friend!
If you’ve ever wanted to take your hamster’s living space to the next level, you’re in the right place.
In this guide, we’ll explore the benefits, materials needed, fantastic DIY ideas, safety considerations, tips for introduction, and maintenance tips for a hamster playground that your tiny companion will adore.
Benefits of a DIY Hamster Playground
Creating a personalized playground for your furry friend goes beyond just adding a touch of charm to their living space.
The endeavor brings forth a multitude of advantages that contribute to your hamster’s overall well-being.
- Mental stimulation: The exploration of different structures, textures, and hiding spots provides mental stimulation, preventing boredom.
- Encourages natural behaviors: Hamsters are naturally curious and love to climb, explore, and burrow. A well-designed playground mimics their natural habitat, encouraging these behaviors.
- Physical activity: The various components of the playground, such as climbing structures and tunnels, promote physical activity.
- Healthier lifestyle: Physical and mental well-being are interconnected, and a stimulating environment supports overall health.
- Stress reduction: A well-designed playground provides a safe and comfortable space for them to retreat and relax, reducing stress levels.
- Prevents boredom: A dynamic playground with various elements keeps them engaged and entertained, preventing boredom-related issues.

- Related post: DIY Hamster Hideouts
- Related post: A Comprehensive Guide to DIY Hamster Bedding
Materials Needed
Embarking on the creation of a personalized hamster playground is an exciting venture, but before you start the construction process, it’s crucial to gather the right materials.
The key is to create a safe and stimulating environment for your furry friend.
Here’s a detailed breakdown of the materials you’ll need:
- Solid base: The foundation of your hamster’s playground is essential for stability. Opt for a sturdy and secure base, such as a plastic or wooden platform.
- Non-toxic building materials: Choose materials that are safe for your hamster to interact with. Avoid any toxic substances that could harm your pet.
- Tunnels: Select hamster-friendly tunnel materials like PVC pipes or cardboard tubes. Ensure they are clean, dry, and free from any sharp edges.
- Hideouts: Hideouts are essential for your hamster to have a cozy and secure space. Use materials like untreated wood or cardboard to create hideouts.
- Climbing structures: Use non-toxic woods or attach safe climbing accessories to the playground. This can include platforms, ramps, and ladders.
- Bedding material: Hamsters appreciate having cozy spots to rest. Ensure the bedding is safe and free from any potential harm, such as loose threads.
- Chew toys: Hamsters have a natural instinct to chew, which is essential for dental health. Integrate chew toys made from safe materials like untreated wood.
- Adhesive-free attachments: Opt for pet-safe glue or secure items with hamster-friendly fasteners. This prevents accidental ingestion of harmful substances.
DIY Hamster Playground Ideas
Embarking on the creation of a DIY hamster playground opens the door to a world of creativity and fun.
Here are some imaginative ideas to inspire your hamster’s own little haven:
Miniature Obstacle Course
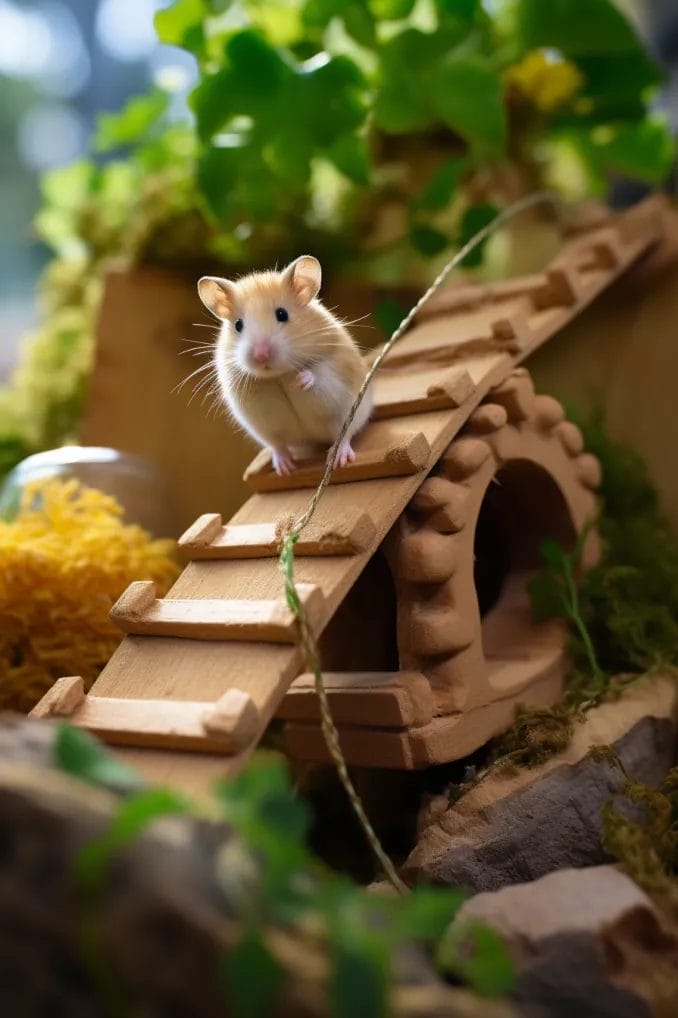
Creating a miniature obstacle course is a fantastic way to promote physical activity and mental stimulation, all while having fun.
This DIY project involves crafting small bridges, ramps, and tunnels that not only challenge the body but also engage the mind.
To ensure a safe and enjoyable experience, it’s crucial to secure each component firmly for stability.
Materials
- Wooden planks: Opt for sturdy, lightweight wooden planks for constructing bridges and ramps.
- PVC pipes: These will serve as tunnels, providing a confined space for added challenges.
- Wood glue and screws: Ensure a secure bond between the components by using a combination of wood glue and screws.
- Sandpaper: Smooth out any rough edges on the wooden surfaces to prevent splinters.
- Paint and brushes: Add a splash of color to make the obstacle course visually appealing.
- Safety gear: Consider including miniature safety cones or flags to enhance the course’s realism.
Design elements
Bridges
- Use two parallel wooden planks for stability.
- Add support beams underneath for durability.
- Ensure a non-slip surface by applying a textured finish or using non-slip pads.
Ramps
- Gradually incline the ramps for varied difficulty.
- Attach a non-slip surface or adhesive grip to prevent slipping.
- Provide a sturdy base to avoid wobbling.
Tunnels
- Utilize PVC pipes of different lengths and diameters.
- Arrange tunnels in various directions for mental stimulation.
- Securely attach tunnels to the ground or other components.
Assembly steps
Planning
- Sketch a layout to visualize the arrangement of bridges, ramps, and tunnels.
- Consider creating different levels of difficulty for added variety.
Cutting and Shaping
- Use a saw to cut the wooden planks and PVC pipes to the desired lengths.
- Sand the edges to achieve a smooth finish.
Assembly
- Apply wood glue to the joints before securing them with screws.
- Double-check the stability of each component.
Painting
- Apply a base coat of primer to the wooden surfaces.
- Use vibrant colors to make the obstacle course visually appealing.
- Allow sufficient drying time between coats.
Safety checks
- Ensure that all components are securely fastened.
- Smooth out any sharp edges to prevent injuries.
Building a DIY miniature obstacle course provides an exciting opportunity for physical and mental engagement.
By incorporating bridges, ramps, and tunnels, you create a dynamic environment that challenges both the body and the mind.
Remember to prioritize safety by securing components firmly and adding a touch of creativity through colorful paint.
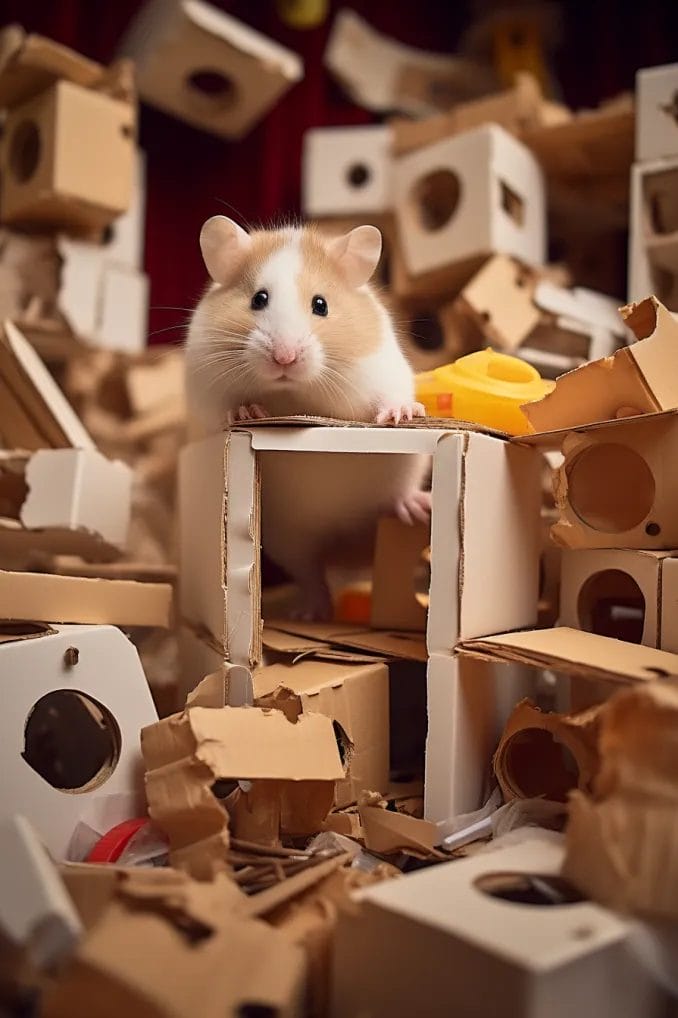
Cardboard Box Hideouts
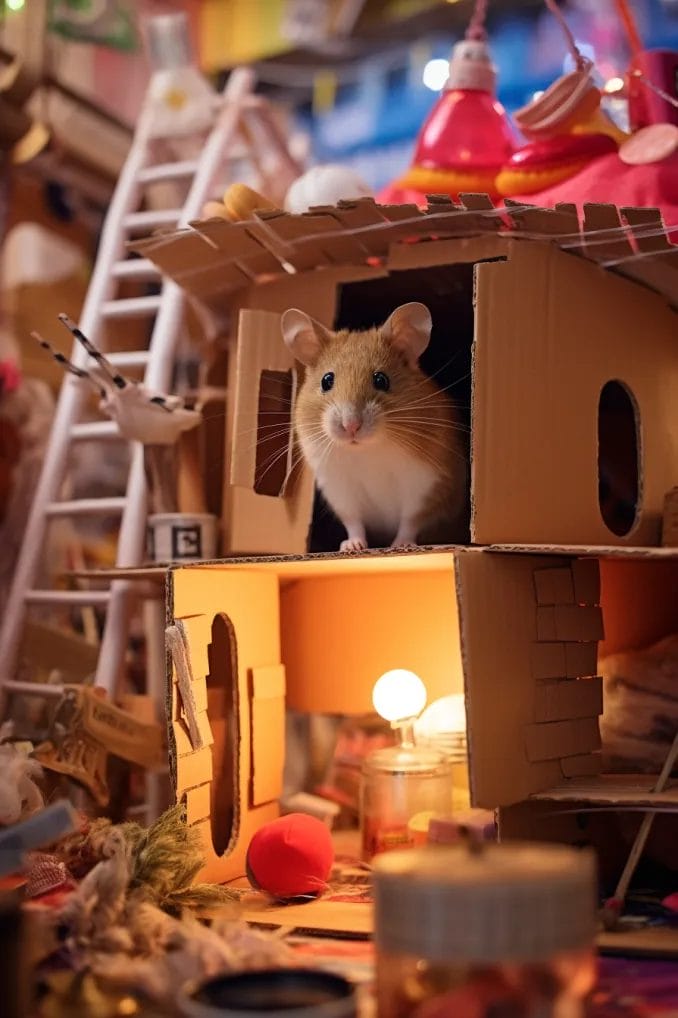
Creating a playful and comfortable environment for your hamster doesn’t always require expensive toys.
With a few simple materials and a touch of creativity, you can fashion cozy hideouts using cardboard boxes.
This DIY project involves cutting openings to create a labyrinth of hideaway spaces, ensuring a safe and stimulating haven for your furry friend.
Materials
- Cardboard boxes: Collect various sizes to provide diversity in your hamster’s hideout experience.
- Scissors or box cutter: Essential for cutting openings and shaping the boxes.
- Non-toxic glue: Securely join different box components without compromising your hamster’s safety.
- Hamster-safe tape: Opt for tape that doesn’t have any adhesive that could harm your pet.
- Decorative paper or safe paint: Add a personal touch to the hideouts with hamster-safe colors and patterns.
- Bedding material: Line the inside of the hideouts with hamster-friendly bedding for comfort.
Design elements
Multiple entrances and exits
- Cut openings on various sides of the boxes to create a maze-like structure.
- Ensure openings are large enough for your hamster to comfortably enter and exit.
Connecting tunnels
- Link boxes together using cardboard tunnels.
- Create a network of pathways for your hamster to explore.
Windows and peekaboo holes
- Add small windows or peekaboo holes for your hamster to look out and satisfy its curiosity.
- Ensure these openings are smooth and free from any sharp edges.
Levels and platforms
- Stack boxes to create multi-level hideouts.
- Add platforms inside the boxes to give your hamster a place to perch.
Assembly Steps
Planning
- Sketch a layout of your hideout design, considering the size and arrangement of boxes.
- Plan the placement of entrances, tunnels, and windows for an engaging experience.
Cutting and shaping
- Carefully cut openings using scissors or a box cutter.
- Shape tunnels by connecting boxes with secure cuts.
Assembly
- Use non-toxic glue to secure the boxes together, forming the desired layout.
- Reinforce connections with hamster-safe tape for added stability.
Decoration
- Cover the exterior of the boxes with decorative paper or safe paint.
- Ensure that any decorations are securely attached and won’t pose a hazard to your hamster.
Bedding
- Line the inside of the hideouts with a hamster-friendly bedding material for comfort.
- Regularly check and replace the bedding to maintain cleanliness.
Crafting cozy hideouts for your hamster using cardboard boxes is a delightful and budget-friendly way to enhance your pet’s living space.
By incorporating multiple entrances, tunnels, and creative design elements, you create a dynamic and engaging environment for your furry friend.
Prioritize safety by smoothing out edges, using non-toxic materials, and regularly inspecting and cleaning the hideouts.
PVC Pipe Hamster Highway
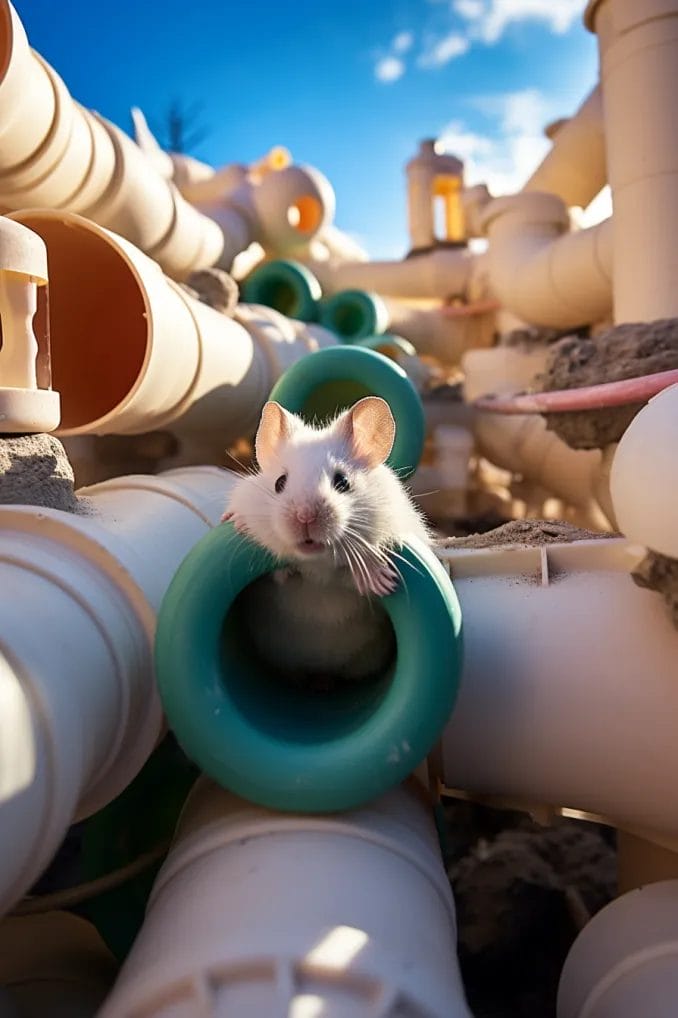
Transform your hamster’s living space into a dynamic playground by constructing a Hamster Highway using PVC pipes.
This DIY project not only adds an adventurous element to your pet’s environment but also facilitates seamless travel between different sections of their habitat.
By connecting multiple cages or play areas, you provide your hamster with an engaging and stimulating experience.
Materials
- PVC pipes: Select pipes of appropriate diameter for your hamster to comfortably traverse.
- PVC connectors: Essential for joining pipes securely, allowing for a stable structure.
- Saw or PVC cutter: To cut the pipes to the desired lengths.
- Sandpaper: Smooth out any rough edges to ensure your hamster’s safety.
- Non-toxic glue: Securely attach PVC connectors to the pipes.
- Hamster-safe tape: Use tape to reinforce connections and provide additional stability.
Design Elements
Layout Planning
- Sketch a layout of the Hamster Highway, considering the placement of cages and play areas.
- Plan the trajectory of the PVC pipes to create a stimulating journey for your hamster.
Variety of pipes
- Incorporate straight pipes, curved pipes, and intersections for a diverse and interesting highway.
- Ensure the pipes are wide enough for your hamster to navigate comfortably.
Cage connections
- Integrate PVC connectors to seamlessly connect the highway to different parts of your hamster’s habitat.
- Consider adding entry and exit points for easy access.
Securing the structure
- Use non-toxic glue to firmly attach PVC connectors to the pipes.
- Reinforce connections with hamster-safe tape to enhance stability.
Elevation changes
- Create ramps or inclines within the PVC highway to add a vertical dimension to your hamster’s journey.
- Ensure gradual changes to prevent any potential falls.
Assembly Steps
Cutting PVC pipes
- Measure and cut the pipes to the desired lengths using a saw or PVC cutter.
- Smooth out rough edges with sandpaper to guarantee a safe environment.
Connecting pipes
- Use PVC connectors to join pipes and create a cohesive highway structure.
- Apply non-toxic glue to secure connections and reinforce with hamster-safe tape.
Attaching to cages
- Integrate the PVC highway with your hamster’s cages using connectors.
- Ensure a secure attachment to prevent any accidental disconnections.
Safety Check
- Inspect the entire structure for stability and smooth edges.
- Make adjustments as needed to guarantee your hamster’s safety during exploration.
Constructing a Hamster Highway using PVC pipes is a fantastic way to elevate your pet’s living space.
This DIY project not only promotes physical activity but also stimulates your hamster’s curiosity and sense of adventure.
With careful planning, secure connections, and attention to safety, you can create a dynamic environment that enhances your hamster’s overall well-being.
Climbing Wall Extravaganza
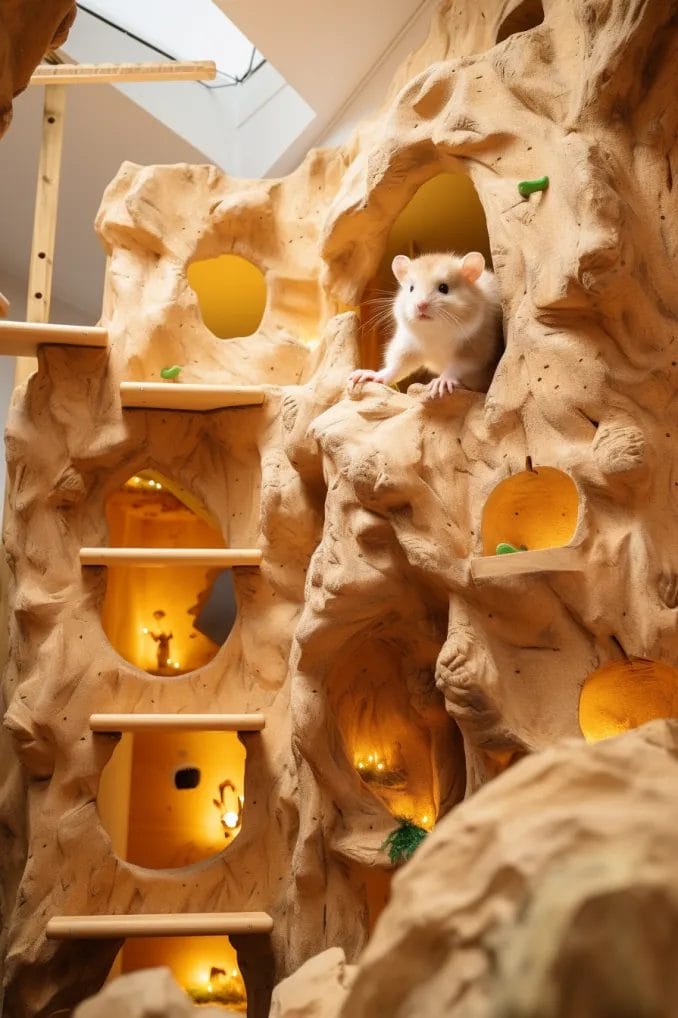
Transform your hamster’s habitat into an exciting vertical playground by constructing a Climbing Wall Extravaganza.
This engaging DIY project allows your furry friend to indulge its natural instincts for climbing and exploration.
By incorporating safe textures and varying platforms, you create an environment that promotes physical activity and mental stimulation.
Materials
- Plywood or wooden board: Select a sturdy base for the climbing wall.
- Hamster-safe textures: Use materials like felt, fleece, or burlap for the climbing surface.
- Wooden blocks: Create platforms at different heights.
- Non-toxic glue: Securely attach textures and platforms to the plywood.
- Hamster-safe screws: Ensure a stable structure by using screws to attach platforms.
- Sandpaper: Smooth out any rough edges for your hamster’s safety.
- Hamster-safe paint: Add a touch of color to the climbing wall for visual appeal.
Design elements
Textured climbing surface
- Cover the plywood with hamster-safe textures to provide a comfortable grip.
- Incorporate a variety of textures for a diverse climbing experience.
Platform placement
- Attach wooden blocks as platforms at different heights.
- Create a staggered arrangement to encourage climbing at varying levels.
Secure attachment
- Use non-toxic glue to firmly attach textures to the plywood.
- Secure platforms with hamster-safe screws to prevent accidental falls.
Visual stimulation
- Add colorful elements using hamster-safe paint to make the climbing wall visually appealing.
- Consider incorporating patterns or designs for added interest.
Safety features
- Smooth out any rough edges using sandpaper to prevent injuries.
- Ensure all surfaces are secure and won’t cause slips during climbing.
Assembly steps
Preparing the base
- Cut the plywood or wooden board to the desired size.
- Sand the edges to create a smooth surface.
Adding textures
- Apply non-toxic glue to the plywood and press the chosen textures firmly onto the surface.
- Ensure an even distribution of textures for a comfortable climbing experience.
Platform placement
- Attach wooden blocks as platforms using hamster-safe screws.
- Space the platforms at varying heights to create a dynamic climbing environment.
Safety check
- Inspect the climbing wall for secure attachment of textures and platforms.
- Make any necessary adjustments to ensure stability.
Visual enhancements
- Add a pop of color using hamster-safe paint.
- Allow sufficient drying time before introducing the climbing wall to your hamster.
Crafting a Climbing Wall Extravaganza for your hamster is an excellent way to enhance its living space with both physical and mental stimulation.
By incorporating safe textures, varying platforms, and visual appeal, you create an engaging environment that encourages natural behaviors.
Digging Box with Burrowable Substrate
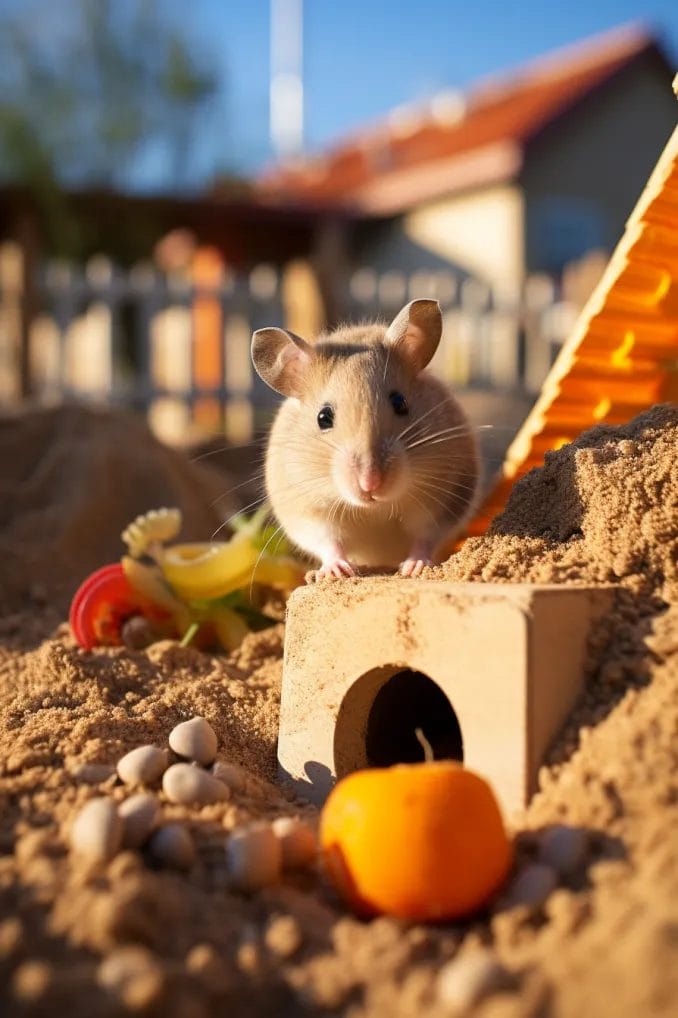
Unlock the joy of natural behaviors for your hamster by crafting a digging box filled with burrowable substrate.
Hamsters have an innate love for digging, and this DIY project not only allows them to express their natural instincts but also provides an engaging and enriching space for endless exploration.
Materials
- Shallow container or box: Select a container with low sides to facilitate easy access for your hamster.
- Burrowable substrate: Opt for materials like shredded paper, coconut coir, or a mix of both.
- Hamster-safe bedding: Ensure the substrate is comfortable and safe for your hamster.
- Digging tools: Add small hamster-safe objects like plastic tunnels or hideouts.
- Optional: Edible Decorations: Consider adding hamster-safe treats for a delightful foraging experience.
- Hamster-safe tape: Use tape to secure any loose edges of the container.
Design elements
Substrate Selection
- Choose a burrowable substrate that mimics the natural environment, such as shredded paper or coconut coir.
- Ensure the substrate is clean, free from any chemicals, and safe for your hamster.
Container choice
- Select a shallow container or box that provides ample space for digging while maintaining easy accessibility for your hamster.
- Consider a container with low sides to allow your hamster to enter and exit effortlessly.
Digging tools
- Integrate small, hamster-safe objects like plastic tunnels or hideouts within the substrate.
- These additions provide additional points of interest and stimulate your hamster’s natural instincts.
Edible decorations (Optional)
- For added enrichment, hide hamster-safe treats within the substrate.
- This encourages foraging behavior, adding an extra layer of engagement for your furry friend.
Safety measures
- Use hamster-safe tape to secure any loose edges of the container.
- Regularly inspect the digging box for wear and tear, ensuring a safe environment for your hamster.
Assembly Steps
Preparing the container
- Clean the chosen container thoroughly to remove any potential contaminants.
- Ensure there are no sharp edges that could harm your hamster.
Adding substrate
- Fill the container with your chosen burrowable substrate.
- Create a layer deep enough to allow your hamster to engage in satisfying digging activities.
Integrating digging tools
- Place small, hamster-safe objects like plastic tunnels or hideouts within the substrate.
- Distribute these tools evenly to encourage exploration across the entire digging box.
Optional edible decorations
- Hide hamster-safe treats within the substrate for a delightful foraging experience.
- Ensure the treats are accessible and do not pose a choking hazard.
Safety check
- Secure any loose edges with hamster-safe tape to prevent potential hazards.
- Regularly inspect the digging box for cleanliness and safety.
Crafting a digging box filled with burrowable substrate provides your hamster with a haven for expressing its natural instincts.
By carefully selecting materials, choosing an appropriate container, and incorporating digging tools, you create an engaging environment that promotes physical and mental well-being.
Hammock haven
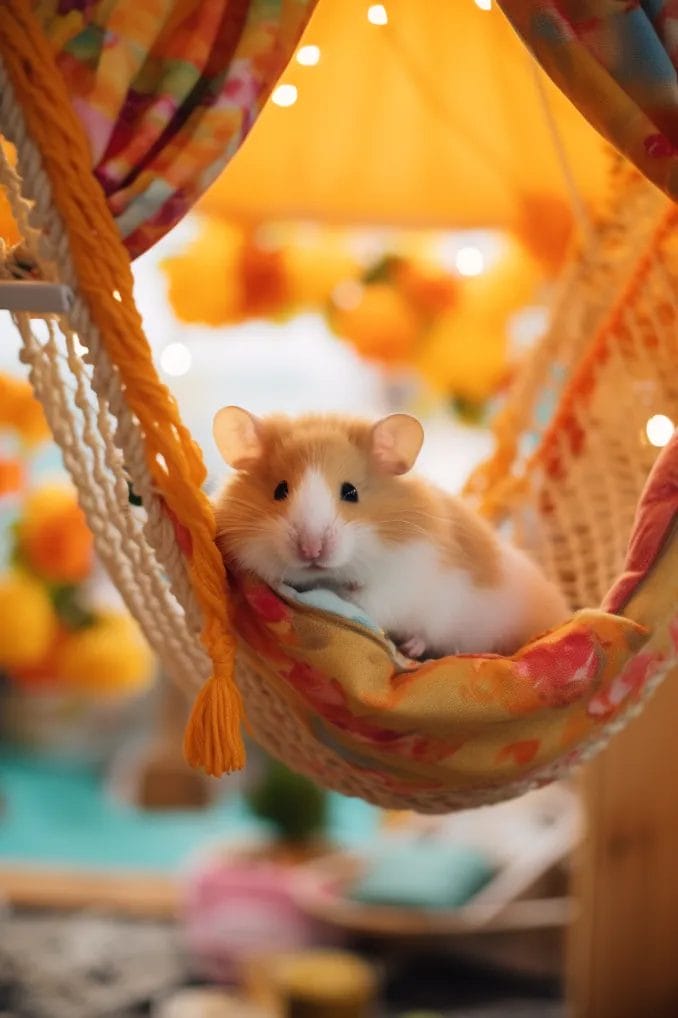
Transform your hamster’s living space into a haven of comfort and relaxation by incorporating hammocks at different levels.
This delightful DIY project not only provides your furry friend with cozy resting spots but also adds a vertical dimension to their play area.
Discover the joy of watching your hamster explore and unwind in their personalized Hammock Haven.
Materials
- Soft fabric: Choose a hamster-safe and breathable fabric for crafting the hammocks.
- Hamster-safe hooks or clips: Ensure secure and stable attachment to the cage.
- Small carabiners: Facilitate easy hanging of the hammocks.
- Scissors: Essential for cutting and shaping the fabric.
- Ruler or measuring tape: Maintain consistency in size and length.
- Hamster-safe tape or cord: Reinforce edges or add extra support if needed.
Design Elements
Hammock fabric
- Select a soft and breathable fabric to ensure your hamster’s comfort.
- Avoid fabrics with loose threads or fibers that could pose a safety risk.
Variety in heights
- Hang hammocks at different levels within the cage.
- This offers your hamster a range of cozy spots to rest, play, and observe its surroundings.
Sturdy attachment points
- Use hamster-safe hooks, clips, and small carabiners to securely attach the hammocks to the cage.
- Ensure that the attachment points can bear the weight of your hamster for added safety.
Easy accessibility
- Design the hammocks with easy entry and exit points for your hamster.
- Incorporate multiple openings to encourage exploration and movement between hammocks.
Reinforced edges
- Strengthen the edges of the hammocks with hamster-safe tape or cord.
- This prevents fraying and ensures the longevity of the hammocks.
Assembly steps
Measuring and cutting
- Measure and cut the fabric into desired hammock shapes and sizes.
- Consider your hamster’s preferences and the available space within the cage.
Adding reinforcements
- Strengthen the edges of the hammocks with hamster-safe tape or cord.
- Reinforce areas where the fabric will be attached to hooks or clips.
Attaching carabiners
- Use small carabiners to facilitate easy hanging of the hammocks.
- Ensure that the carabiners are securely fastened to the fabric.
Securing the cage
- Attach the hammocks to the cage using hamster-safe hooks or clips.
- Distribute the hammocks at various levels to maximize the space.
Safety check
- Verify that all attachment points are secure and can bear the weight of your hamster.
- Monitor your hamster’s interaction with the hammocks to ensure their safety and enjoyment.
Crafting a Hammock Haven for your hamster adds a touch of luxury and comfort to their living space.
By selecting soft, breathable fabric and incorporating multiple levels, you create an engaging environment that caters to your hamster’s natural instincts.
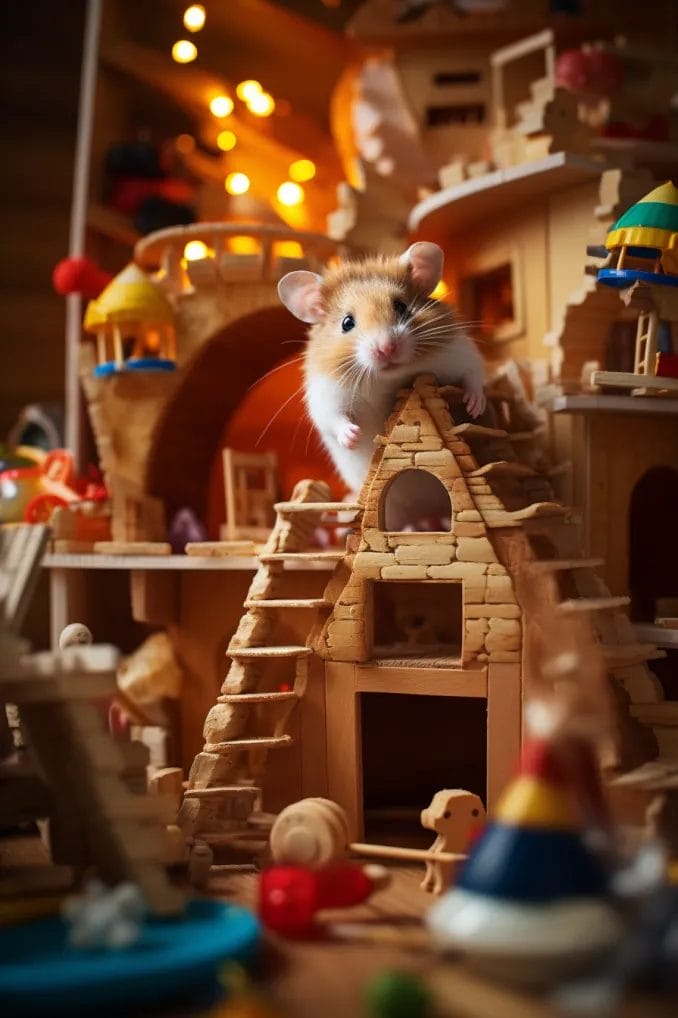
Multi-Level Play Structure
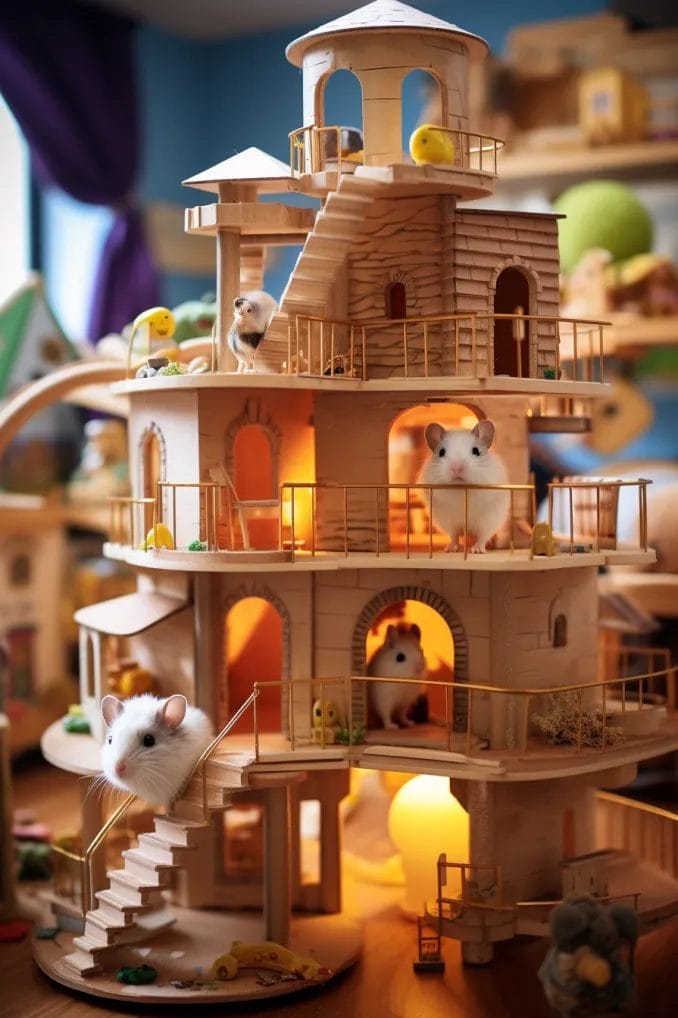
Elevate your hamster’s habitat with a captivating multi-level play structure that invites exploration and physical activity.
This DIY project, designed with ramps, platforms, and tunnels, not only provides a dynamic environment but also allows your furry friend to navigate their space from various perspectives.
Let’s embark on creating a multi-level play haven using non-toxic materials for the utmost safety and enjoyment.
Materials
- Plywood or wooden boards: Choose sturdy, hamster-safe materials for the base structure.
- Non-toxic paint or varnish: Add a pop of color and ensure the play structure is visually appealing.
- Hamster-safe glue: Securely attach components for stability.
- Wood screws: Reinforce connections and enhance the structure’s durability.
- Ramps, platforms, and tunnels: Utilize a variety of shapes and sizes to create diversity.
- Sandpaper: Smooth out any rough edges for your hamster’s safety.
- Hamster-safe tape: Add an extra layer of security for your hamster’s well-being.
Design elements
Base structure
- Begin with a solid base using plywood or wooden boards.
- Consider the dimensions of your hamster’s habitat to ensure a suitable fit.
Ramps and platforms
- Integrate ramps and platforms at various angles and heights.
- Create a staggered arrangement to encourage climbing and exploration.
Tunnels
- Include tunnels to add an element of mystery and intrigue.
- Connect tunnels to platforms to create a seamless flow.
Non-toxic finishing
- Apply non-toxic paint or varnish to add visual appeal and protect the wood.
- Choose colors that are stimulating for your hamster without compromising their safety.
Safety features
- Smooth out any rough edges using sandpaper to prevent injuries.
- Reinforce connections with wood screws for stability.
Assembly steps
Planning the layout
- Sketch a layout to visualize the arrangement of ramps, platforms, and tunnels.
- Plan for multi-levels to make the play structure more engaging.
Base construction
- Cut and assemble the base structure using plywood or wooden boards.
- Ensure the base is large enough to accommodate various components.
Adding ramps and platforms
- Attach ramps and platforms at different levels.
- Create a mixture of inclines and flat surfaces for diversity.
Incorporating tunnels
- Integrate tunnels by securely attaching them to platforms.
- Ensure tunnels have smooth edges and are wide enough for your hamster.
Non-toxic finishing
- Apply non-toxic paint or varnish to enhance the visual appeal.
- Allow sufficient drying time before introducing it to your hamster.
Safety check
- Inspect the entire play structure for stability and safety.
- Make any necessary adjustments to eliminate potential hazards.
Crafting a multi-level play structure for your hamster is an exciting way to enrich their living space.
By incorporating ramps, platforms, and tunnels with careful attention to safety and aesthetics, you create a dynamic environment that stimulates your hamster’s natural instincts.
Tissue Box Maze
Unleash the curiosity of your hamster with a creative and simple DIY project — a Tissue Box Maze.
By transforming a basic tissue box into an engaging maze, you provide your furry friend with both mental and physical exercise.
This interactive maze stimulates your hamster’s exploration instincts, turning a mundane object into a source of endless entertainment.
Materials
- Empty tissue box: Recycle a tissue box to form the foundation of the maze.
- Scissors or craft knives: Essential for cutting openings and passages.
- Hamster-safe tape: Use tape to secure any edges or create additional maze features.
- Hamster-safe decorations (optional): Add safe embellishments for visual appeal.
- Hamster treats or food pellets: Use these as incentives to encourage exploration.
Design elements
Creating openings and passages
- Cut openings on different sides of the tissue box to form entry and exit points.
- Craft various passages inside the box, ensuring a labyrinthine layout.
Variable heights and levels
- Alter the heights of passages to add a three-dimensional aspect.
- Create levels within the maze by using the box’s existing structure or adding platforms.
Tape for reinforcement
- Use hamster-safe tape to secure any edges or reinforce specific features.
- Ensure all tape is securely fastened and doesn’t pose a hazard to your hamster.
Optional decorations
- Consider adding hamster-safe decorations for visual interest.
- Avoid anything that could be chewed on or pose a safety risk.
Incentives for exploration
- Place hamster treats or food pellets strategically within the maze.
- This encourages your hamster to navigate and discover hidden rewards.
Assembly steps
Planning the maze layout
- Sketch a basic layout on paper, considering the size and structure of the tissue box.
- Plan entry and exit points and the placement of passages.
Cutting openings and passages
- Carefully cut openings in the tissue box using scissors or a craft knife.
- Create a maze-like structure with interconnected passages.
Adjusting heights and levels
- Vary the heights of passages by cutting openings at different levels.
- Utilize the box’s structure or add platforms to create an interesting maze layout.
Taping and reinforcement
- Use hamster-safe tape to secure any edges and reinforce features.
- Ensure tape is applied securely to prevent any hazards.
Optional decorations
- Add optional hamster-safe decorations for a touch of visual appeal.
- Ensure decorations do not compromise the maze’s safety.
Incentivizing exploration
- Place hamster treats or food pellets strategically within the maze.
- This provides an incentive for your hamster to explore and navigate the maze.
Safety check
- Inspect the entire maze for any potential hazards.
- Make adjustments as needed to ensure a safe and enjoyable experience.
Creating a Tissue Box Maze is a simple yet effective way to enhance your hamster’s environment. This DIY project engages both their mental and physical faculties, providing entertainment and exercise.
Burrow Box Adventure
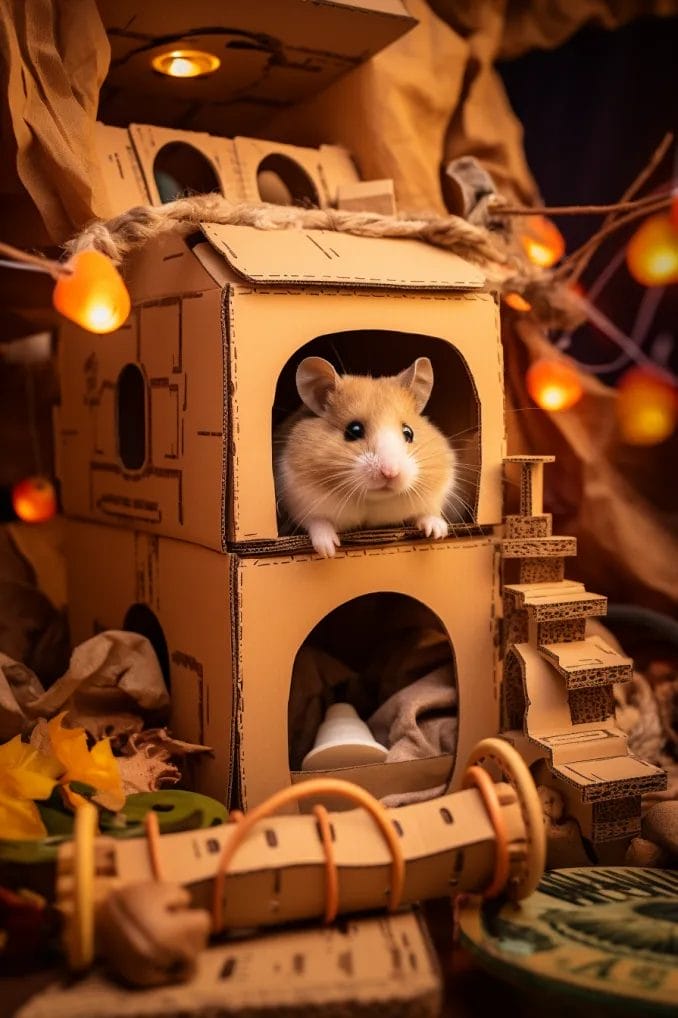
Step into the world of your hamster’s natural instincts with a delightful DIY project – the Burrow Box Adventure.
Crafted from safe materials like cardboard or untreated wood, this project provides your furry friend with an environment that encourages burrowing, nesting, and exploration.
With multiple entrances and exits, your hamster is sure to find joy in this creatively designed burrow box.
Materials
- Cardboard or untreated wood: Choose a material that is safe for your hamster to explore and chew on.
- Scissors or craft knife: Essential for cutting openings and shaping the burrow box.
- Non-toxic glue: Securely join components for stability.
- Hamster-safe tape: Reinforce edges and provide additional support.
- Hamster bedding material: Fill the burrow box with hamster-safe bedding for comfort.
- Decorative elements (optional): Add safe embellishments for visual interest.
Design elements
Safe material selection
- Choose cardboard or untreated wood to ensure the safety of your hamster.
- Avoid materials with toxic substances or sharp edges.
Multiple entrances and exits
- Cut openings on various sides of the burrow box to create multiple entry and exit points.
- This encourages natural exploration and stimulates your hamster’s instincts.
Sturdy construction
- Use non-toxic glue to firmly attach components of the burrow box.
- Reinforce edges with hamster-safe tape to enhance stability.
Comfortable bedding
- Fill the burrow box with hamster-safe bedding material.
- Choose materials that provide comfort and mimic the softness of natural burrows.
Optional decorations
- Add optional hamster-safe decorations for visual interest.
- Ensure decorations do not compromise the safety and comfort of the burrow box.
Assembly steps
Planning the burrow layout
- Sketch a layout to visualize the arrangement of entrances, exits, and internal spaces.
- Plan for a design that allows your hamster to burrow and explore freely.
Material preparation
- Cut the cardboard or untreated wood into pieces based on your planned design.
- Ensure edges are smooth to prevent any injuries.
Building the burrow box
- Use non-toxic glue to securely join the components of the burrow box.
- Reinforce edges with hamster-safe tape for added stability.
Creating multiple entrances
- Cut openings on various sides of the burrow box to create multiple entry and exit points.
- Ensure openings are large enough for your hamster to move comfortably.
Adding bedding material
- Fill the burrow box with hamster-safe bedding material.
- Create a cozy environment that mimics the natural burrowing experience.
Optional decorations
- Add optional hamster-safe decorations for visual interest.
- Ensure decorations are securely attached and do not pose any hazards.
Safety check
- Inspect the entire burrow box for stability and safety.
- Make adjustments as needed to provide a secure and enjoyable space for your hamster.
Crafting a burrow box adventure offers your hamster a haven to indulge in their natural instincts.
This DIY project not only encourages burrowing and exploration but also provides a cozy and safe space for your furry friend.
Natural Wood Playground
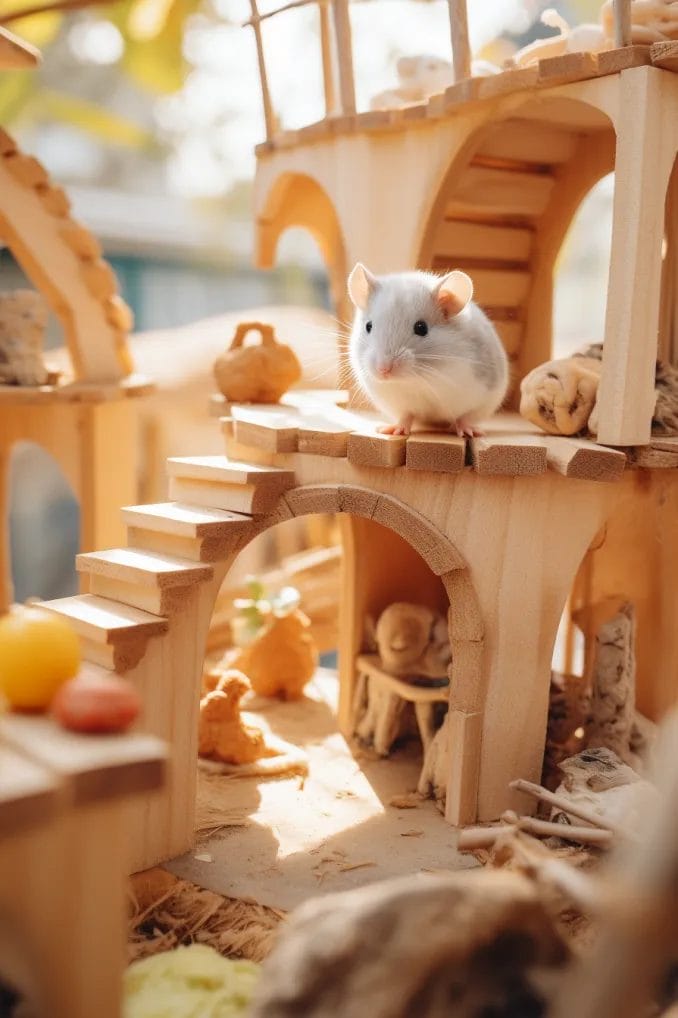
Elevate your hamster’s playtime experience with a unique and health-conscious DIY project – a Natural Wood Playground.
By incorporating untreated natural wood into the design, not only do you enhance the aesthetic with a rustic touch, but you also provide a chewable surface that promotes dental health.
This carefully crafted playground offers your furry friend a stimulating and safe environment for exploration.
Materials
- Untreated natural wood: Choose a variety of safe wood types such as pine, applewood, or aspen.
- Saw or woodcutter: Essential for cutting and shaping the wood into desired components.
- Non-toxic sealant (optional): Use to add a protective layer to the wood, especially if it’s prone to splintering.
- Hamster-safe glue: Securely attach components for stability.
- Hamster-safe sandpaper: Smooth out any rough edges to prevent injuries.
- Hamster bedding material: Line certain areas for comfort and mimic natural nesting behavior.
Design elements
Natural wood selection
- Choose untreated natural wood for its safety and suitability for chewing.
- Consider wood types that are known to be safe for hamsters, ensuring they are free from toxins.
Chewable surfaces
- Incorporate components that serve as chewable surfaces.
- This promotes dental health by satisfying your hamster’s natural instinct to gnaw.
Variety of wood shapes
- Cut the wood into various shapes, such as platforms, tunnels, and blocks.
- Create a diverse playground to stimulate different activities.
Safe sealant (optional)
- If necessary, use a non-toxic sealant to add a protective layer to the wood.
- This prevents splintering and ensures the longevity of the playground.
Secure construction
- Use hamster-safe glue to securely attach wood components.
- Reinforce connections to ensure the stability of the playground.
Smooth edges
- Sand any rough edges with hamster-safe sandpaper.
- This eliminates the risk of injuries during exploration.
Bedding integration
- Line certain areas of the playground with hamster bedding material.
- Mimic natural nesting behavior and provide comfort.
Assembly steps
Wood selection and cutting
- Choose suitable natural wood and cut it into various shapes using a saw or woodcutter.
- Consider the size of your hamster and the available space within their habitat.
Chewable surfaces
- Ensure that at least some components of the playground serve as chewable surfaces.
- This addresses your hamster’s instinct to gnaw, promoting dental health.
Optional sealant application
- Apply a non-toxic sealant if the chosen wood is prone to splintering.
- Allow sufficient drying time before introducing the playground to your hamster.
Secure construction
- Use hamster-safe glue to assemble the components securely.
- Pay attention to the stability of the connections to prevent accidents.
Smooth edges
- Sand any rough edges with hamster-safe sandpaper to eliminate potential hazards.
- Ensure all surfaces are smooth to the touch.
Bedding integration
- Line certain areas of the playground with hamster bedding material.
- Create cozy spots that mimic your hamster’s natural nesting instincts.
Safety check
- Inspect the entire playground for stability and safety.
- Make any necessary adjustments to provide a secure and enjoyable space for your hamster.
Crafting a Natural Wood Playground for your hamster combines aesthetic appeal with practical benefits for their well-being.
This DIY project not only offers a visually pleasing environment but also promotes dental health through chewable surfaces.
Safety Considerations
Ensuring the safety of your hamster is of utmost importance when crafting a DIY playground. Here are key considerations to keep in mind:
Material selection
- Choose materials without sharp edges or toxic substances.
- Opt for untreated natural wood or other hamster-safe options.
Secure fastening
- Ensure all parts of the playground are securely fastened.
- This prevents collapses or injuries during your hamster’s playtime.
Regular inspections
- Regularly inspect the playground for wear and tear.
- Promptly replace any damaged components to maintain a safe environment.
Adhesive selection
- If using adhesive, choose a pet-safe option.
- This ensures that the materials remain securely attached without posing a risk to your hamster.
Airing out Construction materials
- Allow construction materials to air out before introducing your hamster.
- This minimizes the potential exposure to any residual odors from adhesives or sealants.
By adhering to these safety considerations, you create a DIY playground that not only enriches your hamster’s environment but also prioritizes their well-being.
Regular vigilance and careful material selection contribute to a safe and enjoyable space for your furry friend.
Tips for Introducing the Playground to Your Hamster
Introducing a new playground to your hamster requires a thoughtful and gradual approach. Follow these tips to ensure a smooth transition and create a positive experience for your furry friend:
- Familiarize with known items: Begin by placing familiar items from your hamster’s existing habitat into the new playground. This helps create a sense of comfort and familiarity.
- Allow independent exploration: Let your hamster explore the new playground at its own pace. Avoid hovering or making sudden movements that might startle your pet.
- Gradual introduction of features: Introduce new features gradually to prevent overwhelming your hamster.
- Patience is key: Be patient during the introduction process. Hamsters may take time to adapt to changes in their environment.
- Avoid loud noises: Hamsters are sensitive to loud noises. When introducing the playground, keep the environment calm and quiet.
- Positive reinforcement: Offer treats as rewards when your hamster interacts with different elements of the playground.
- Observe and adjust: Pay close attention to your hamster’s behavior during the introduction. Observe their reactions to different features and adjust accordingly.
- Create comfortable resting spots: Ensure there are comfortable resting spots within the playground. Provide cozy hideouts and soft bedding to make your hamster feel secure.
- Monitor stress signals: Keep an eye out for stress signals such as excessive grooming, changes in eating habits, or hiding.
Conclusion
Crafting a DIY hamster playground is a rewarding endeavor that benefits both you and your pet.
The creative process allows you to bond with your hamster while providing an enriched environment for them to thrive.
Remember to prioritize safety, choose pet-friendly materials, and regularly maintain the playground to ensure a happy and healthy life for your furry friend.
Get ready to embark on this delightful journey of crafting joy for your hamster!
- Related post: 10+ Best DIY Hamster Toy
- Related post: How To Take Care Of A Hamster
- Can Cats Eat Carrots? What Every Cat Owner Should Know - July 13, 2026
- Can Cats Eat Broccoli? Is It Safe or Should You Avoid It? - July 9, 2026
- Can Cats Eat Mango? Vet-Reviewed, Risks & Safe Feeding Guide - July 8, 2026
GIPHY App Key not set. Please check settings