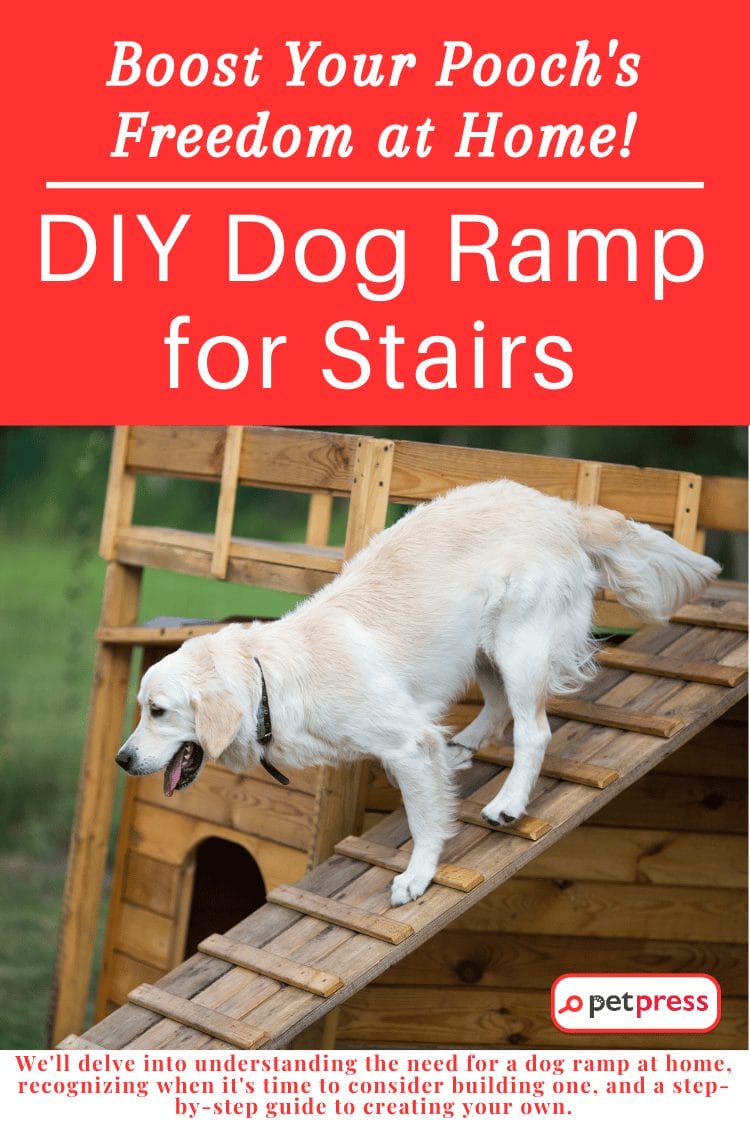
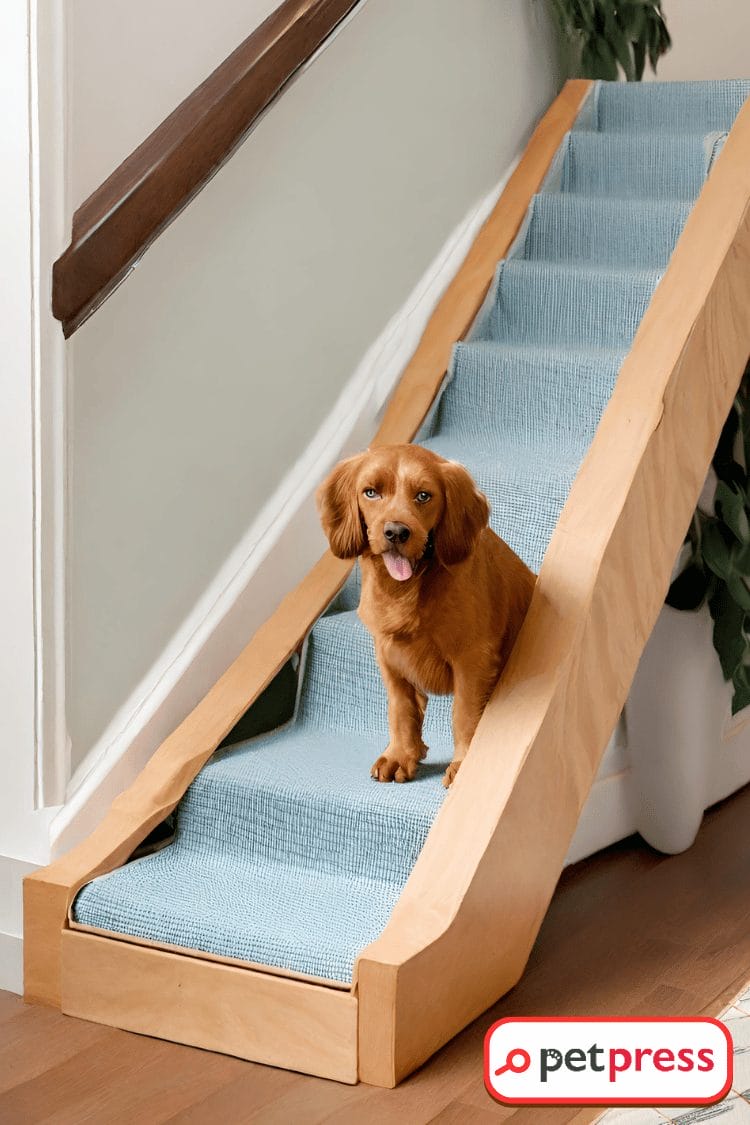
Hello, fellow pet lovers! Welcome to our latest blog post dedicated to enhancing the quality of life for our four-legged family members. As ardent pet parents, we continually strive to make our homes puppy-proof and senior-dog-friendly. One thing that can significantly contribute to this is creating a DIY dog ramp for stairs.
This unassuming home improvement project can pack a surprising amount of benefits. Firstly, it helps our beloved canine companions conquer stairs with ease, significantly reducing the risk of injuries or strain on their bodies. Secondly, it ensures comfort and promotes independence, which is particularly important for our aging dogs.
In this comprehensive guide, we’ll delve into understanding the need for a dog ramp at home, recognizing when it’s time to consider building one, and providing a step-by-step guide to creating your own. We’ll also touch on pointers to help your dog adapt to using the ramp and some maintenance and safety tips.
So, leash up and prepare for a fun DIY adventure that will boost your pooch’s freedom at home like never before!
Why a Dog Ramp is Essential at Home
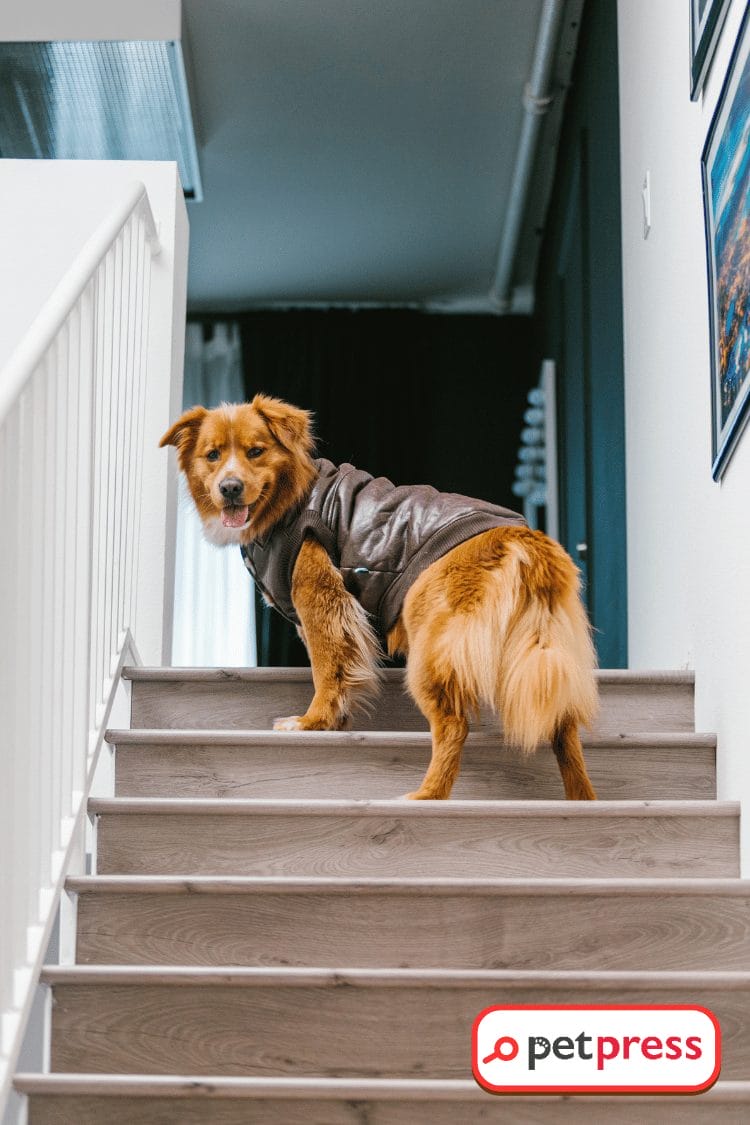
As our dog’s age increases, they may encounter a few hurdles in their daily routines, primarily due to age-related mobility problems. Just like humans, dogs can suffer from arthritis, hip dysplasia, or general joint wear and tear. This can make simple tasks, like climbing stairs, a daunting and often painful ordeal.
Building a DIY dog ramp for stairs at home can be a game-changer, offering a plethora of benefits. Safety stands paramount among them, as the ramp eliminates the potential risks of falls and injuries that could hurt our pets.
Providing ease of access, these ramps make it simpler for dogs to move around, especially those precious old-timers or wee little pups who find stairs intimidating. Moreover, these ramps foster a sense of autonomy, allowing dogs to navigate their beloved home territory without constant human assistance.
Let me share a personal story that underlines the importance of a dog ramp. Charlie, my lively, ever-curious Beagle, had always been an agile climber. However, as he grew older, I noticed a gradual hesitation in his approach to the stairs. Climbing had become strenuous for him due to his advancing age and the onset of arthritis. That’s when I decided to build a dog ramp at home. The transformation in Charlie was evident almost immediately. The once-dreaded stairs were no longer an obstacle but a playground for him to explore independently.
This first-hand experience proved how a simple ramp can significantly improve the quality of life for our pets. If you’ve experienced a similar story, why not share it on social media? Others could benefit from your experiences!
So, let’s dive into figuring out when it’s the right time to consider building a DIY dog ramp for stairs.
When to Consider a Dog Ramp for Stairs
Recognizing when your dog needs a ramp is key to ensuring their well-being and comfort. Below are a few signs you might need to consider building that DIY dog ramp for stairs:
A. Recognizing the Signs
- Reluctance or Fear: Does your dog hesitate or show signs of fear when confronting stairs? If yes, a ramp could be the solution to alleviate that fear and hesitation.
- Physical Discomfort: Watch out for signs of physical discomfort or pain such as limping, slow movement, or stiffness, especially after climbing stairs.
- Change in Behavior: A rapid change in your pet’s behavior, such as decreased activity or avoidance of stairs, can suggest the need for a ramp.
B. Specific Breed and Size Considerations
Different breeds and sizes may necessitate the need for a ramp at different stages. For instance, smaller breeds or breeds prone to joint issues (like Dachshunds or Bulldogs) may need a ramp earlier than larger, more agile breeds.
C. Vet Consultation
Before making a decision, it’s always wise to consult with your vet. They can advise based on your dog’s health, age, and unique needs.
Remember, every dog is different. The decision to install a DIY dog ramp for stairs should be based on an individual assessment and professional advice. Your dog’s comfort, safety, and health should always be the priority.
Found these signs helpful? Share them with your fellow pet lovers on social media to spread awareness! Up next, we’ll delve into the materials you’ll need to create your fantastic dog ramp. Stay tuned!
Step-by-Step Guide to Building a Dog Ramp for Stairs
Building a DIY dog ramp for stairs might sound a bit daunting, but don’t worry! We’re here to guide you through it. Here are detailed, easy-to-follow steps with the help of which you can construct a safe and comfortable ramp for your furry friend.
A. Detailed Steps
- Measure the Area: Determine the height and depth of your stairs to decide the length of your ramp. A gentle slope is always easier for your pet to climb.
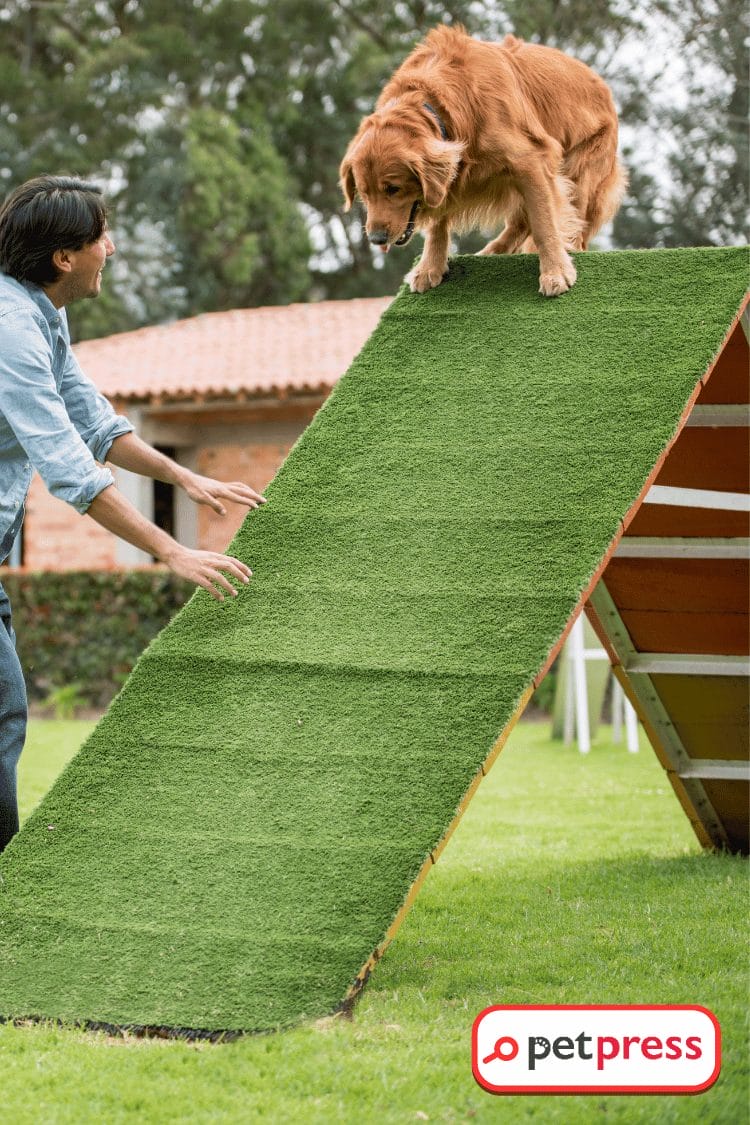
- Gather the Materials: You’ll need plywood for the base, carpeting for traction, screws, and a saw.
- Cut the Plywood: Using the measurements taken, cut the plywood to form the base of the ramp.
- Secure the Carpet: After cutting the carpet to size, attach it to the plywood using a staple gun. The carpet will provide the necessary traction for your pet.
- Attach the Ramp: Secure the ramp to the stairs using screws for stability.
B. Safety Precautions
Ensure safety during the construction process by following these guidelines:
- Proper Tools Usage: Make sure you’re familiar with the tools you’re using and in good condition.
- Measurement Accuracy: Accurate measurements of the stairs and plywood are essential to avoid any imbalance or instability in the ramp.
- Secure Installation: Ensure the ramp is securely installed to the stairs to prevent any mishaps.
With these steps and precautions, you’re on your way to making your dog’s life more comfortable and independent. Remember, share your progress and the final product with your fellow pet lovers on social media! They may be inspired by your DIY efforts.
In the next section, we’ll talk about how to train your dog to use this new piece of furniture. Stay tuned!
Training Your Dog to Use the Ramp
Your ramp is ready, and it looks fantastic, but how do you get your dog to use it? Here are some tips and tricks to help ease your dog into using their new ramp.
1. Start Slow:
It’s important not to rush your dog into using the ramp. Start by allowing them to get familiar with this new addition. Leave the ramp in your dog’s space and let them sniff and explore it at their own pace. This exploration stage helps the dog to understand that this new object is not a threat. You can also try moving your dog’s favorite toys or blanket near the ramp to create a positive association.
2. Use Treats:
We all love a good treat, and dogs are no different. Use your dog’s favorite treats to create a positive reinforcement. Start by placing treats at the bottom of the ramp and gradually move them up as your dog becomes more comfortable.
This breadcrumb trail of treats will motivate your dog to walk up the ramp. The trick is to make your dog associate the ramp with something positive – in this case, delicious treats!
3. Lead the Way:
Dogs often learn by following the actions of their human or their fellow pets. Show your dog how to walk up and down the ramp. You could even try this with a toy dog first to show them the way. Repeat this exercise a few times until your dog seems comfortable following the path. Remember to shower them with praise each time they successfully navigate the ramp.
The key to successful ramp training lies in patience and positivity. Your dog might not get it right immediately, and that’s completely fine. Celebrate the small wins and keep encouraging your dog in their ramp journey.
Share your training stories on social media with other pet lovers. They might have additional tips or need some for their pets!
Maintenance and Safety Tips
The construction of your DIY dog ramp for stairs is only half the journey. Ensuring its maintenance and safety is a continuous process. Here are some essential tips to ensure your ramp remains safe and functional for your furry friend:
A. Regular Checks for Stability
The stability of the ramp is crucial for your dog’s safety. Regularly check the screws to ensure they are not loosening over time. The ramp should be firm and not wobble when your dog uses it. If you notice any instability, it requires immediate attention to avoid any risk of injury.
B. Cleaning the Ramp
A clean ramp is not just about aesthetics; it’s also about safety. Regularly clean the ramp to remove dust and debris. The build-up of such materials can make the surface slippery and could lead to accidents. Depending on the material of your ramp, a simple wipe-down or vacuum might suffice.
C. Ensuring the Safety of the Ramp
Over time, the carpeting on the ramp might wear off, and there could be instances of sharp edges or protruding nails. Regularly inspect the entire ramp for such safety hazards. The carpeting should remain intact to provide the necessary traction for your pet. If you notice any sharp edges or nails, fix them immediately to prevent any harm to your dog.
The safety and comfort of your pet are paramount while using the DIY dog ramp for stairs. Sharing these maintenance and safety tips with your friends and fellow pet lovers on social media could help them ensure their ramps remain a safe haven for their pets too! Join us in creating safer and more comfortable homes for our furry friends.
Conclusion
And there you have it! You’re now equipped with all the knowledge you need to build a DIY dog ramp for stairs. This simple yet impactful project can significantly enhance the comfort and independence of your furry friend, especially those struggling with mobility. We discussed the need, the construction, training, and finally the maintenance of the ramp, ensuring your pet’s safety at every step.
Building a DIY dog ramp for stairs is more than a project; it’s a testament to the love we have for our pets. We encourage you to embark on this journey. So, why wait? Grab those tools and start crafting!
If you found this guide helpful, don’t forget to share it with your fellow pet lovers on social media. Your experience could inspire others and make a world of difference in the lives of more pets. Here’s to safer, happier homes for our pets!
FAQs About DIY Dog Ramp for Stairs
Dogs, especially older ones or those with joint issues, may find climbing stairs challenging. A ramp can provide them with a comfortable and safe way to navigate stairs, reducing strain and risk of injury.
Introduce the ramp gradually, let your dog explore it, and use treats to motivate them to climb. Be patient and use lots of positive reinforcement.
Regularly check for stability, keep the ramp clean, and watch out for any sharp edges or protruding nails. Also, ensure the carpeting for traction remains intact.
If your dog is nervous, take baby steps. You can start by encouraging them to take a step or two with treats and praise. Over time, they should get used to it.
Yes, you can. However, remember to use materials safe for outdoor use and ensure the ramp doesn’t become slippery when wet.
Craving more pet-centric DIY projects? Explore our other articles!
Ready to embark on more exciting DIY journeys to continue enhancing your pet’s life? We have plenty of resources that will keep you engaged, educated, and inspired. Don’t wait; dive deeper into our pet-friendly articles now!
Build the Perfect Oasis: DIY Dog House Outdoors Guide!
DIY Dog Cone: Make Their Recovery Sweeter and Fashionable
DIY Dog Toys for Power Chewers: Save Money, Delight Pups
- How Do Snakes Inject Venom? The Science Behind the Bite - July 29, 2026
- Can Cats Eat Rice? When It’s Safe and When to Avoid It - July 27, 2026
- Soft Coated Wheaten Terrier: Ireland’s Sunniest Farm Dog - July 23, 2026
GIPHY App Key not set. Please check settings